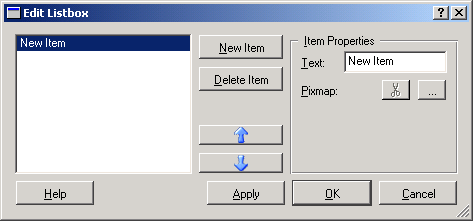
The Edit List Box Dialog
This dialog lets you edit the entries that are displayed in a list box. You can reach it by selecting Edit in the context menu of a list box. In the unlabeled list box on the left-hand side of the dialog, you can see the entries that are currently inserted.
- New Item
-
Click on this button to insert a new entry. By default, it will have the text New Item and no icon.
- Delete Item
-
Click on this button to delete the currently selected entry.
- Arrow Buttons
-
With the arrow buttons, you can change the order of the entries in the list box. Clicking on the up-arrow button moves the currently selected entry one position up; clicking on the down-arrow button moves the entry one position down.
- Item Properties
-
In this area, you can specify the pixmap and the label to be displayed for the currently selected entry. To change the label, enter the new text in the Text field. To assign or change a pixmap, which is displayed next to the word Pixmap, click on the button labeled .... Clicking on the scissors icon removes the pixmap so that the current entry is represented only by its label.


